Last week I showed you a shot of my backyard passive aggressive trellis and climbing rose project. It’ll take some time to fill in, but it will be worth the wait! I’ll have to show a full backyard before and after in a week or two after a trio of bushes are replaced that didn’t make it through the winter. Now that is a before and after, trust me!
In the meantime, and because my roses and daylilies out front are now exploding in blooms, I’ll share our front yard before and after!
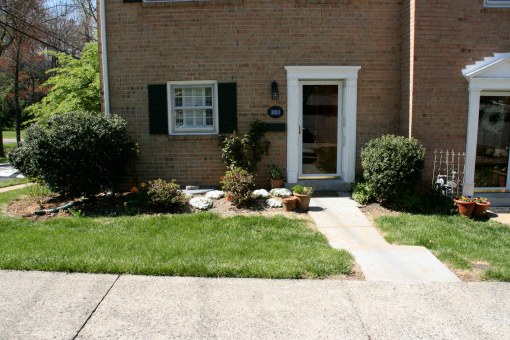
When we moved in over two years ago, our front yard looked a little something like this:
There were two large boxwoods on either corner of the front of the townhouse. In the bed to the left of the door were two small (red) azaleas. Behind the azaleas were two (different) rose bushes, one of which was partially hidden by the adjacent boxwood. Then there were these random white almost groundcover plants spread through the rest of the bed. I put a few pots of herbs by the stoop, but other than that and some mulch, the front yard stayed as-is for our first year of residence. Pretty sad, huh?
Here’s a shot of the side yard. Another smaller boxwood, exposed (and hole-filled) plastic downspout tube, a honeysuckle “trash” bush/tree, an old hydrangea (hidden behind that honeysuckle), and a whole lotta dirt.
One year later I decided that enough was enough: I couldn’t live with the front yard as it was any longer! So, I did what any DIY gal would do: I made a plan, hit up the plant nursery, and called in my manual labor (my parents) so we could transform the front and add some serious curb appeal! (Husband was gone deployed in Kuwait that spring, so he lucked out on all the hard work!)
You’re probably wondering, “Self, how does one plan a garden without any prior landscaping background?!” Well – it’s a lot easier than you’d think! Here’s a bit of the process…
Before you make a visit to the plant nursery for any DIY landscaping, DO YOUR RESEARCH! I can’t stress that enough! Otherwise (and I’ve done this more times than I can count) you’ll wander aimlessly and end up buying the wrong plants for the wrong places in the wrong quantities.
So, for the week or two before the re-scaping weekend, I spent a lot of time online researching shrubs and plants that:
- Were suitable for our climate (Zone 6B)
- Liked full sun
- Provided all-season color (different plants blooming at different times)
- Wouldn’t look totally bare in the winter (“core” plants be evergreen)
Two great resources to help with the above are the National Gardening Association’s USDA Hardiness Zone Finder (where you can type in your zip code to find your zone) and online plant nurseries like Nature Hills (huge inventory to search through, organized by zone and sunlight types, lots of background info…I wouldn’t necessarily order from here, just use it for research). And, don’t forget, when you’re making a plan, it’s best to cluster plants in odd numbers, no less than three! And, when planning the shape of the bed – use a hose! It’s easy to move around and helps you visualize the space.
I drew the plan on some graph paper, showing where existing plants and to-be-transplanted plants were going, and “planting” my picks to as much to scale as possible. Armed with my sketch, I went to the local plant nursery and went to work.
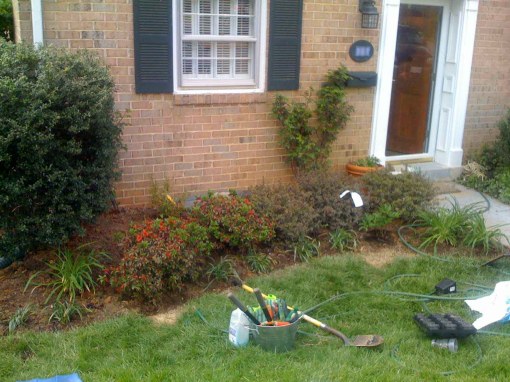
My parents are awesome. I can’t believe they helped with all of this!!! Here’s the garden last April as we were planting:
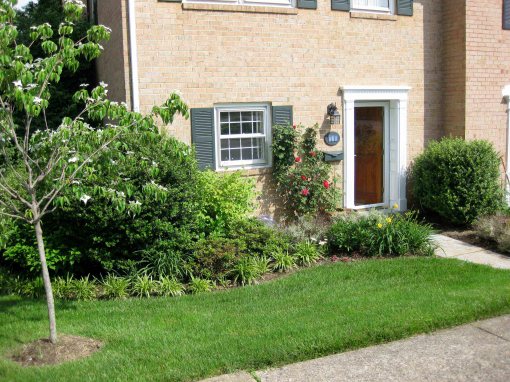
A bit of an improvement, huh? Well – here’s what a full year of growing will do:
See that nice curve of the bed? And the cute little dogwood in bloom in the front left?
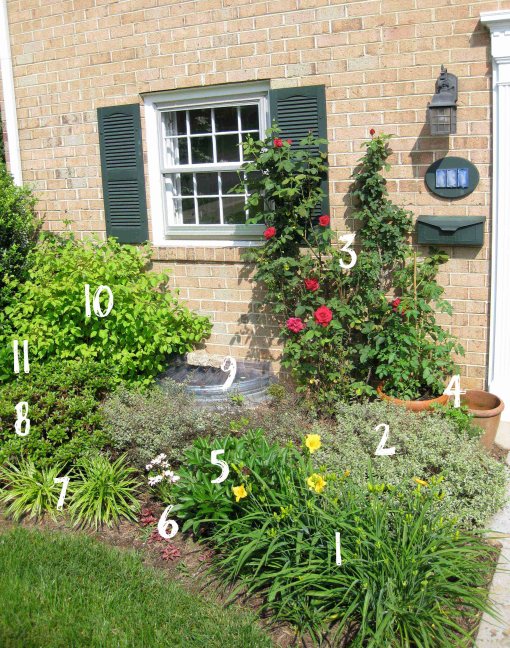
Here’s a close-up of the front bed with the play-by-play below:
- Up in front is a pyramid of “Stella de Oro” daylilies that bloom bright yellow flowers alllll summer long. I can’t recommend daylilies enough – profuse bloomers, easily divided, really low maintenance.
- Behind them and following the curve of the bed’s edge is a trio of “Silver Anniversary” abelia. I liked that they were semi-evergreen and had a 3’x3′ mounded shape. But, as you can see, they’re not too happy (boo). The late March 10″ snowstorm hurt them, and their growth is patchy at best. So, I’m thinking of replacing them with St. Johns Wort “Ames”, which are evergreen and have a similar mounded size, plus some more yellow flowers.
- Set behind the abelia and to the left of the door is a trio of terra cotta pots: cherry tomato plant in one, thyme and parsley in another, and some basil, oregano, and dill (will go) in the other.
- There’s that original rose bush, blooming like crazy – seriously they are the most fragrant blooms ever! It, like a lot of roses, suffers from black spot and aphids, but there are tons of organic sprays that help.
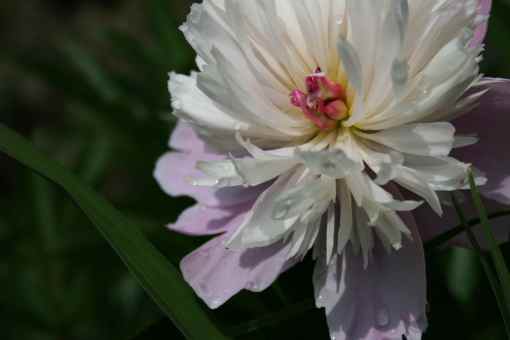
- Next to the daylilies is the beautiful “Sorbet” peony, though sans bloom in this pic. Here’s a close up to show you just how pretty it was! It blooms in early May, so the rest of the spring and summer it’s a nice, glossy green shrub.
- Clustered in front of the peony are three “Lemon Symphony” osteospermum, a pretty pale yellow daisy-like flower, and some pink variegated coleus (which are unfortunately not too happy…I think they’ll soon be traded out for some impatiens or begonias).
- Following the curve of the bed are a bunch of “Silvery Sunproof” variegated liriope. These are the best plants for lining beds, as they grow nice and bushy, have pretty purple shoots in summer, and can easily be divided.
- Behind the liriope are the pair of original azaleas. One of them stayed in place, and the other was transplanted to follow the curve of the abelia and balance the bed a little better. It bugs me that they’re red (I’d rather they be pink or white), but they’re of decent size and happy, so I think I’ll keep ’em.
- You can see the window well and cover… Because of some water issues in the window well, we decided to add another piece of metal to make it higher and lessen the chance of water coming in. I still need to come up with something to better hide it from plain view…maybe some Knockout Rose bushes? Hmm…
- To the left of the window well is an “Arctic Fire” dogwood. It grows to be a perfect 4′ tall (just under the windowsill), with white blooms in spring, yellow leaves in fall, and bright red branches all winter to add some color (especially perfect for Christmastime!).
- In front of the dogwood and behind the azaleas are a few clumps of “Becky Shasta” daisies. These are 2′ white daisies that grow over the azaleas mid-summer and add a lot of flowery goodness to the bed. They’re just starting to come up, which is why you can’t see them yet!
Now along the side of house…
- Barely visible is an amazingly happy greenish-white “Limelight” hydrangea, which is tucked between the two boxwoods on the corner of our house.
- Wrapping around the curve of the bed are the last of the liriope. I really love how nice and neat it makes things.
- Continuing along the edge of the bed are six English lavender plants (transplanted from the front of the walkway – they got too big!). They produce so many gorgeous purple spikes and their scent is unmistakeable when walking down the sidewalk! I can’t wait to make some sachets and soaps this summer.
- That big tree/bush thing is the same honeysuckle from the before pics – only it’s HUGE now! We keep the braches trimmed relatively high to make it as tree-like as possible, and it actually looks pretty nice (and smells great this time of year!) despite the fact that it’s kind of a weed!
Behind the lavender and filling in the rest of the be are a few azaleas and a variety of hostas – some big, some small, some solid, some variegated – but all in clusters of three! They looooove the shade and are very happy…except the slugs are too…need to put some soapy water on them!
So there you have it! The full front yard before and after. Quite a transformation, huh?! What would have cost a few thousand dollars for a landscaper to do, my parents and I accomplished on a Saturday for around $450 – all it took was a little research, creativity, and some heavy lifting!
